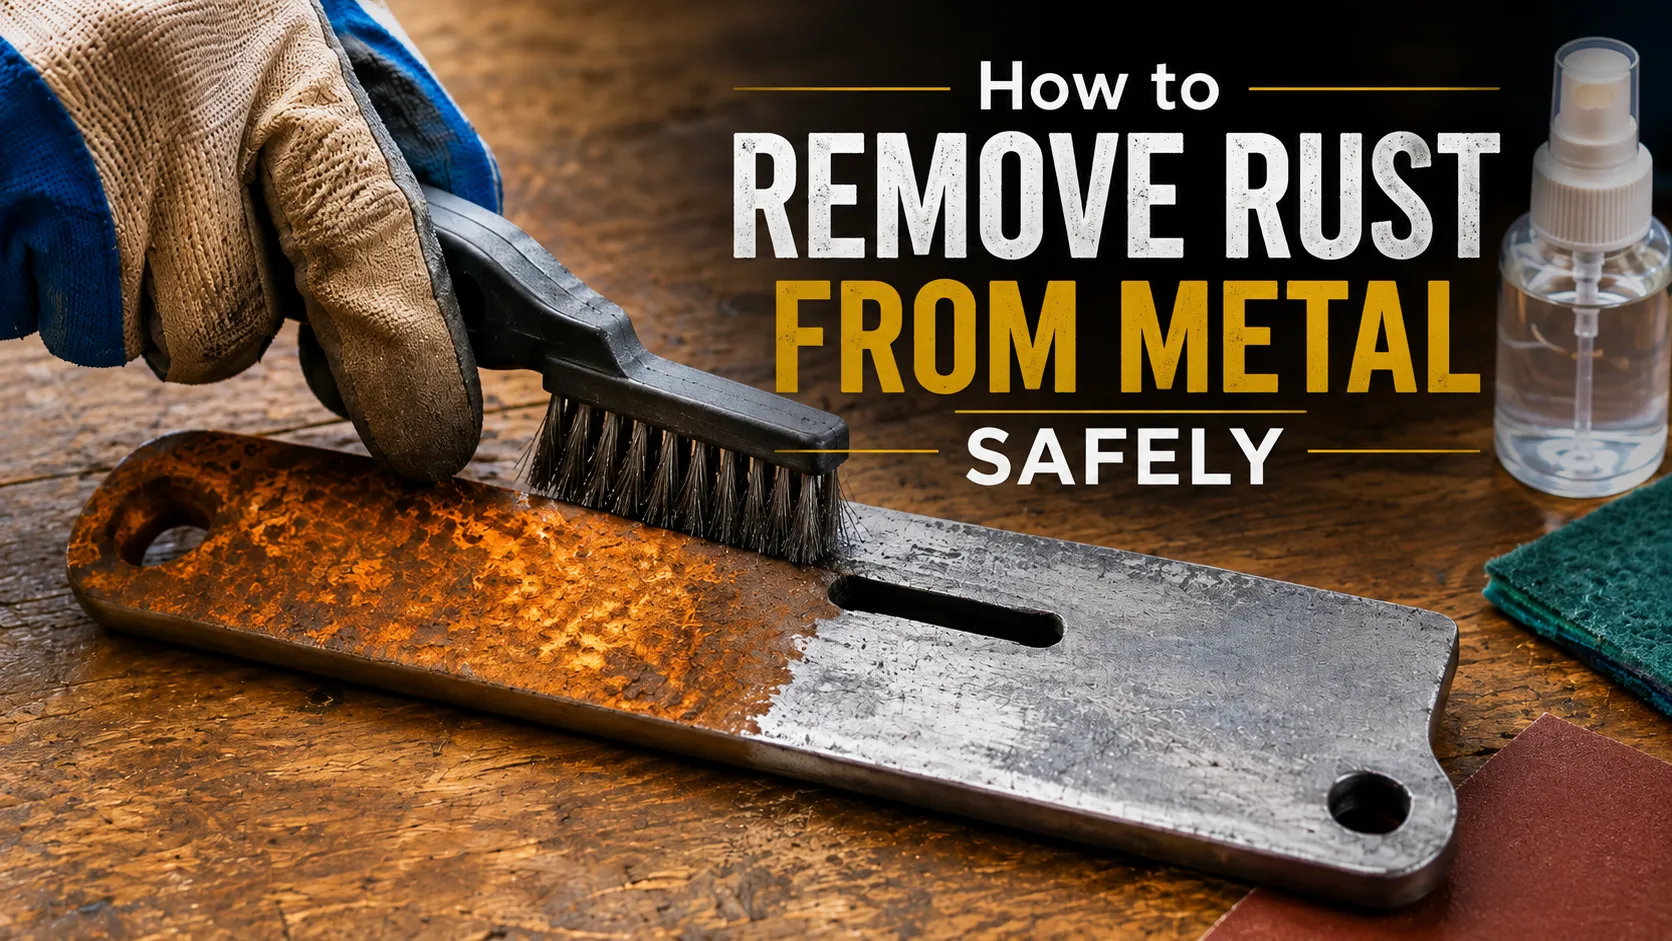
Rust removal works best when the method matches the object. Light corrosion on a bare steel tool may need only gentle mechanical cleaning, while a painted chair, galvanized bracket, or heavily rusted railing calls for a different approach.
Start by identifying the metal and its finish, then judge how far the corrosion has progressed. Use the least aggressive method that can reasonably do the job and move to stronger abrasion or chemical treatment only when necessary. That approach removes rust without creating avoidable scratches, stripping a sound coating, or taking off more metal than intended.
Check the Metal and Finish Before You Remove Rust
Ordinary red-brown rust forms on iron and steel as corrosion progresses in the presence of oxygen and moisture. Bare iron rusts more readily when water remains on the surface, which is one reason exposed steel needs protection after cleaning.
Before choosing a remover, look at what surrounds the rust. Bare steel gives you more freedom to use abrasives or compatible chemical treatments. Paint, plating, chrome, galvanizing, and decorative finishes change the decision because a treatment that removes corrosion may also alter the surrounding surface.
The depth of the damage matters too. A thin rusty film is different from loose scale, deep pits, or visible thinning. Cleaning can remove corrosion products, but it cannot replace metal that has already been lost.
Check four things before treatment:
- whether the underlying metal is bare or coated;
- whether the rust is light, flaky, or deeply pitted;
- whether preserving the existing finish matters;
- whether the object can be removed and soaked or must be treated in place.
A rusty wrench and a painted patio-chair leg may look similar at first glance, yet the acceptable treatment is quite different. The wrench may tolerate visible cleaning marks. The chair may need localized repair that leaves most of the existing paint untouched.
Choose the Least Aggressive Method That Will Do the Job
There is no single best rust-removal method for every metal surface. A better starting point is to match the treatment to the amount of corrosion, the finish, and the size of the object.
This table gives a practical way to narrow the options.
| Situation | Good starting approach | Main caution |
|---|---|---|
| Light rust on bare steel | Gentle mechanical cleaning | Stop once the rust is removed |
| Smooth surface where scratches matter | Fine, controlled cleaning in a test area | Watch for dulling or new marks |
| Small removable bare-metal part | Compatible soaking treatment | Check material and coating compatibility |
| Large bare-metal object | Local abrasion or surface-applied remover | Work in manageable sections |
| Painted metal with localized rust | Repair the affected area | Preserve sound surrounding paint |
| Heavy, flaky corrosion | Stronger mechanical removal or suitable rust treatment | Check for deep material loss |
| Metal being prepared for painting | Clean and prepare for the chosen coating system | Follow primer or converter requirements |
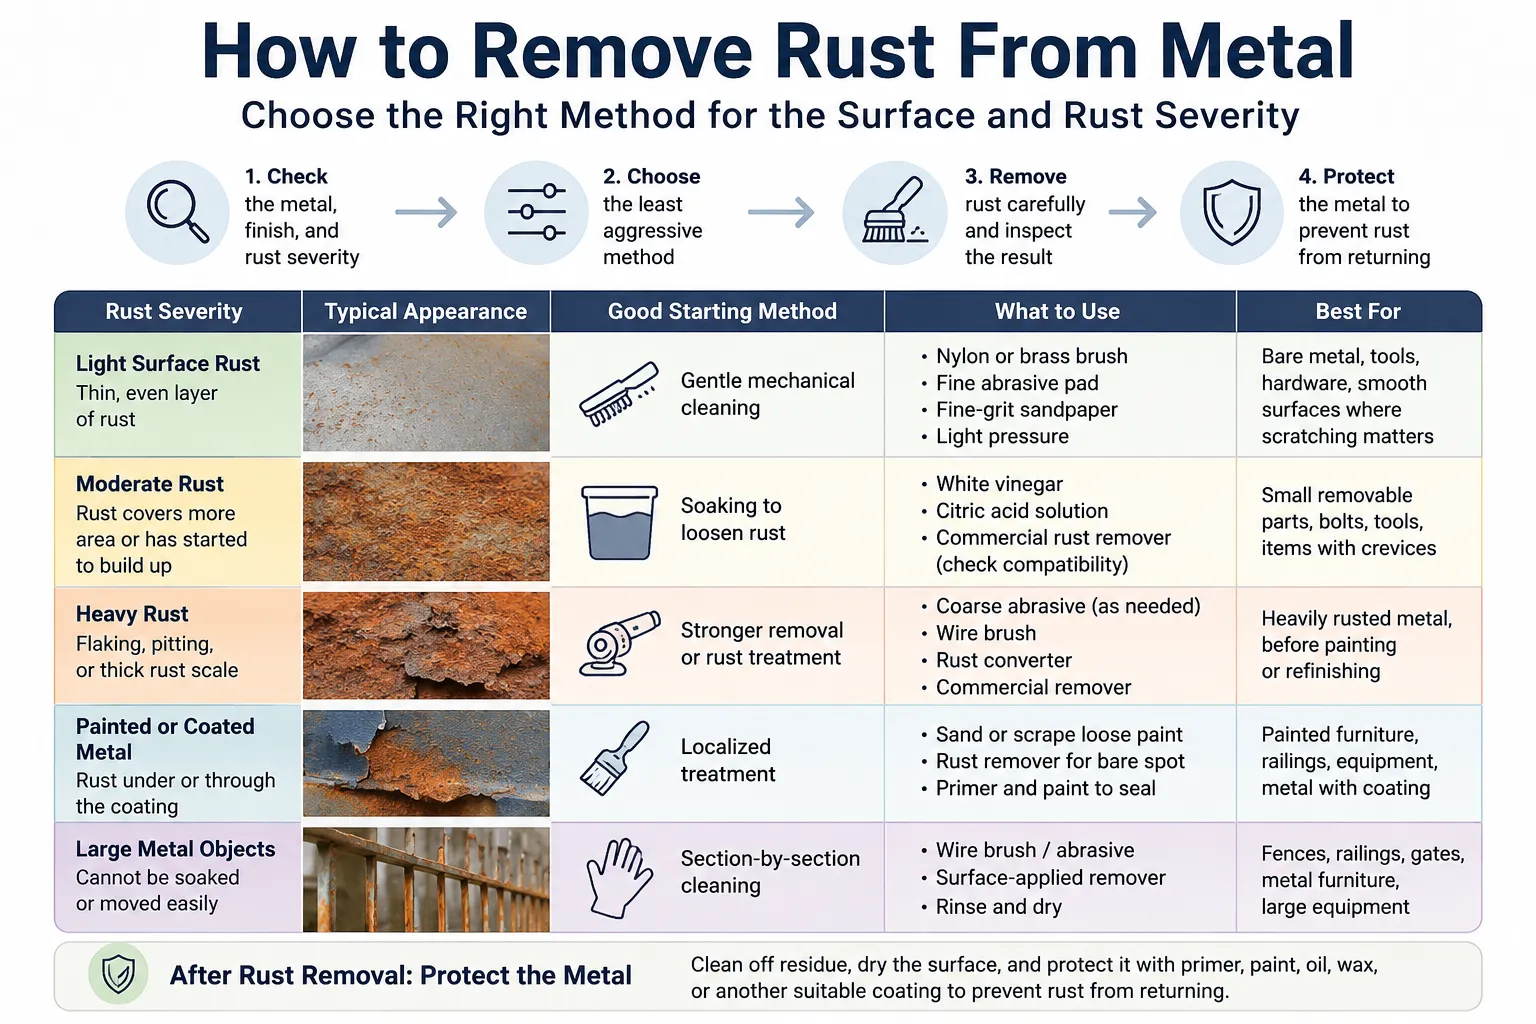
Starting gently also gives you a useful stopping point. If a mild treatment clears the corrosion, continuing with coarser sandpaper or a stronger chemical adds risk without improving the basic result.
Paint preparation is an exception because appearance is not the only goal. The cleaned surface also has to meet the requirements of the primer, converter, or coating that will be applied afterward.
Remove Light Surface Rust Without Scratching More Than Necessary
Light surface rust often responds to controlled mechanical cleaning. The objective is to remove corrosion rather than polish the metal as aggressively as possible.
First wipe away dirt and grease so you can see the affected area. Test a suitable brush, pad, or fine abrasive on a small section, especially when the original texture or finish matters. Use modest pressure, clear away loosened residue, and inspect the surface before continuing.
Conservation guidance for machined ferrous surfaces illustrates why restraint matters. Sandblasting, powered wire brushes, and coarse abrasive papers can create pits or deep scratches, while excessive polishing can remove original surface detail and even change dimensions. A household tool does not need museum-level treatment, but the same principle applies: stop removing material once the corrosion is gone.
Where scratching is a concern, use a controlled sequence:
- Clean loose dirt and grease from the area.
- Test the chosen method on a small, less noticeable section.
- Work with light pressure over a limited area.
- Wipe away residue and inspect the result.
- Stop if the surrounding finish begins to change faster than the rust disappears.
A plain steel hand tool can often tolerate minor cleaning marks. A polished fitting, decorative object, or precisely machined part deserves a more conservative approach.
If gentle cleaning does not reach rust trapped in recesses, threads, or joints, changing the method may be better than simply pressing harder.
Soak Small Bare-Metal Parts When Rust Covers More of the Surface
Soaking is useful when corrosion reaches around curves, threads, fasteners, and recesses that are tedious to clean evenly by hand. It works best with small removable parts whose material and finish are known.
Using White Vinegar
Plain white vinegar is one household option for suitable iron and steel items. Vinegar contains mild acetic acid, which can help loosen iron-oxide deposits. University of Maine Cooperative Extension demonstrates the method on rusty steel garden clippers and notes that the treatment may be slow.
Clean away oil and dirt before soaking so the liquid can reach the rusty areas. Check the part periodically rather than treating a long soak as automatically better. Once the corrosion has loosened enough to remove, rinse and dry the item before deciding whether another pass is necessary.
Avoid using vinegar as a universal recipe. Plated hardware, painted pieces, galvanized metal, mixed-material objects, and items containing adhesives or decorative finishes may need a different method. Full immersion is a poor experiment when you do not know how the rest of the object will react.
There is also no useful universal soak time for every piece of metal. Rust thickness, geometry, temperature, and the condition of the part all affect progress. Inspecting the object is more reliable than following an arbitrary number of hours.
Using a Commercial Rust Remover
A commercial remover can be a better choice when its label clearly identifies suitable materials and application methods. Some products are made for immersion, while others are gels or liquids intended to remain on a vertical or localized surface.
Read the directions for the exact product rather than borrowing instructions from another remover. Compatibility can vary even within one manufacturer’s product line. For example, Rust-Oleum lists different material restrictions and application procedures for its bath, gel, and jelly rust removers.
Check the label for surface compatibility, protective equipment, application method, contact time, cleanup, and preparation before painting. Test an inconspicuous area when the manufacturer recommends it.
Do not combine a rust remover with other cleaners unless its label specifically permits that combination. More chemicals do not automatically produce faster or safer rust removal.
Treat Large, Painted, or Coated Metal in Place
A gate, railing, patio table, bench, or large piece of equipment cannot be dropped into a container of vinegar or rust remover. Large objects are usually easier to handle section by section, with the treatment adapted to the surrounding finish.
Large Bare-Metal Surfaces
Clean enough of the object to see where sound metal begins. Light corrosion may need only localized abrasion, while a broader rusty area may justify a compatible surface-applied remover.
Working in sections makes it easier to compare treated and untreated areas. It also helps prevent the common mistake of continuing to grind or sand after the remaining surface is already adequate for the next step.
Power tools can speed up heavy mechanical cleaning, but they remove material quickly. Use the tool with its required guarding and eye protection, and follow its operating instructions. OSHA requires guards and eye protection for abrasive-wheel operations covered by its standard.
Painted Metal
Rust appearing through paint usually means the coating has been disrupted at that location. Removing the orange discoloration from the paint surface alone may leave corrosion beneath a loose edge.
When the surrounding coating is sound, keep the repair local. Remove loose paint and corrosion as required for the selected repair system, prepare the exposed area, and apply a compatible primer or topcoat where repainting is appropriate.
Extra precautions apply to painted building components in older U.S. homes. Disturbing lead-based paint by sanding or scraping can create hazardous dust. EPA advises homeowners working on pre-1978 homes to determine whether lead paint may be present and to use lead-safe practices if they perform the work themselves.
Galvanized steel also deserves separate treatment. Galvanizing is a protective zinc coating, so the goal is not merely to expose bright steel underneath. Choose a cleaner or surface-preparation method specifically compatible with galvanized metal rather than assuming the process for bare steel is appropriate.
Use Stronger Removal for Heavy Rust or Paint Preparation
Flaking scale, persistent corrosion, and deep pitting may require more aggressive mechanical cleaning or a dedicated rust-treatment product. At this point, inspecting the remaining metal becomes as important as removing the visible rust.
Clear away loose corrosion until you can judge the underlying material. Hand sanding or brushing may be enough for a small area; larger surfaces may justify powered equipment when it can be used safely and without removing excessive sound metal.
Rust converter and rust remover are not interchangeable terms. A remover is used to take corrosion away from the surface. A converter is applied to suitable remaining rust as part of a preparation or coating process. The National Park Service makes the same distinction in its iron-restoration guidance and stresses following the converter manufacturer’s instructions before priming.
That distinction matters when the object will be painted. If a coating system calls for clean prepared metal, simply applying converter over loose scale does not substitute for the required surface preparation. Other systems are specifically designed to work over firmly attached residual rust. Follow the instructions for the products that will actually be used together.
Heavy corrosion also creates a point where ordinary cleaning should stop. Perforation, extensive thinning, severe deformation, or deep damage on a load-bearing or safety-critical component cannot be evaluated by appearance alone. Making a badly corroded part look cleaner does not establish that it is strong enough to remain in service.
Dry and Protect the Metal After Rust Removal
Once the rust is gone, remove whatever residue the treatment left behind. The cleanup method depends on what you used. Some commercial rust removers require rinsing and thorough drying, while another product may specify a different preparation before coating. Rust-Oleum’s own instructions, for example, direct users to rinse or wipe treated metal and dry it before subsequent steps.
Drying matters because freshly exposed iron and steel remain vulnerable to renewed corrosion. Canadian Conservation Institute guidance notes that protective coatings such as appropriate oils or waxes can help slow rusting on suitable iron surfaces.
Choose the final protection according to the object rather than using one finish everywhere:
- Bare hand tools may use an appropriate protective oil, wax, or corrosion-preventive coating.
- Metal that is being repainted should use a primer and topcoat system compatible with the substrate and existing finish.
- A surface treated with a commercial remover or converter should follow that product’s preparation and coating instructions.
- Plated or galvanized metal may require finish-specific maintenance instead of ordinary paint.
Inspect the object one more time before calling the job finished. Pits may remain after the loose rust has been removed because corrosion can remove metal below the original surface. More sanding will not restore that missing material.
Start With the Surface, Not the Strongest Product
The safest practical way to remove rust from metal is to make the treatment fit the object. Light corrosion on bare steel may need only careful mechanical cleaning. Small removable parts can sometimes be soaked, while painted, galvanized, large, or heavily corroded objects require more selective treatment.
Identify the finish, judge the condition, and begin with the least aggressive suitable method. Once the rust is removed, clean up the treatment residue, dry the metal, and protect the exposed surface so rust removal is not immediately followed by another round of corrosion.
FAQ
Can you remove rust from metal without sanding?
Yes. Small bare-metal parts can sometimes be treated with white vinegar or a compatible commercial rust remover. For coated, plated, or galvanized surfaces, check compatibility before using a chemical treatment.
Is vinegar safe for removing rust from every type of metal?
No. Vinegar is better suited to certain iron and steel items. It can affect coatings, plating, galvanized surfaces, adhesives, or decorative finishes, so avoid full immersion when the material or finish is uncertain.
How do you remove rust from painted metal?
Treat the damaged area rather than automatically stripping the entire object. Remove loose paint and corrosion as required for the repair, prepare the exposed metal, and use a primer or coating compatible with the existing finish.
What should you do if rust comes back after cleaning?
Check whether the metal was fully dried and protected after treatment. Bare iron and steel remain vulnerable to renewed corrosion, so an appropriate oil, wax, primer, paint, or other protective coating may be needed.
When is a metal part too rusty to keep using?
Rust removal is not enough when corrosion has caused perforation, extensive thinning, severe deformation, or deep damage to a load-bearing or safety-critical part. In those cases, the part may need professional assessment or replacement rather than further cleaning.